
Claude Code
Using Claude Code with Fast-Token
Quick start
This guide helps you get started with Claude Code powered by Fast-Token in just a few minutes.
1. Install Claude Code
Local install
curl -fsSL https://claude.ai/install.sh | bashirm https://claude.ai/install.ps1 | iexInstall with npm
Requires Node.js 18 or later
npm install -g @anthropic-ai/claude-code2. Configure the Fast-Token API
To use Fast-Token model services through an Anthropic API–compatible setup, configure the following environment variables.
- Set
BASE_URLtohttps://fast-token.com - Set
AUTH_TOKENto the API Key from the Fast-Token platform - Set
MODELto a model supported in the model list.
macOS
- In Terminal, run the following command to check your default shell type.
echo $SHELL- Set environment variables according to your shell type:
# Replace <Fast-Token_API_KEY> with your Key from the Fast-Token platform
echo 'export BASE_URL="https://fast-token.com"' >> ~/.zshrc
echo 'export AUTH_TOKEN="<Fast-Token_API_KEY>"' >> ~/.zshrc
echo 'export MODEL="claude-sonnet-4-5"' >> ~/.zshrc# Replace <Fast-Token_API_KEY> with your Key from the Fast-Token platform
echo 'export BASE_URL="https://fast-token.com"' >> ~/.bash_profile
echo 'export AUTH_TOKEN="<Fast-Token_API_KEY>"' >> ~/.bash_profile
echo 'export MODEL="claude-sonnet-4-5"' >> ~/.bash_profile- In Terminal, run the following commands to apply the environment variables.
source ~/.zshrcsource ~/.bash_profile- Open a new terminal and run the following commands to verify the environment variables are set.
echo $BASE_URL
echo $AUTH_TOKEN
echo $MODEL
Windows
On Windows, you can set Fast-Token’s Base URL and API Key as environment variables via CMD or PowerShell.
CMD
- In CMD, run the following commands to set environment variables.
REM Replace <Fast-Token_API_KEY> with your Fast-Token API Key
setx AUTH_TOKEN "<Fast-Token_API_KEY>"
setx BASE_URL "https://fast-token.com"
setx MODEL "claude-sonnet-4-5"- Open a new CMD window and run the following commands to verify the environment variables are set.
echo %AUTH_TOKEN%
echo %BASE_URL%
echo %MODEL%
PowerShell
- In PowerShell, run the following commands to set environment variables.
# Replace <Fast-Token_API_KEY> with your Fast-Token API Key
[Environment]::SetEnvironmentVariable("AUTH_TOKEN", "<Fast-Token_API_KEY>", [EnvironmentVariableTarget]::User)
[Environment]::SetEnvironmentVariable("BASE_URL", "https://fast-token.com", [EnvironmentVariableTarget]::User)
[Environment]::SetEnvironmentVariable("MODEL", "claude-sonnet-4-5", [EnvironmentVariableTarget]::User)- Open a new PowerShell window and run the following commands to verify the environment variables are set.
echo $env:AUTH_TOKEN
echo $env:BASE_URL
echo $env:MODEL
3. Start using
After configuration is complete, go to your project directory and run claude in the terminal to start using Claude Code.
cd /path/your-project
claude
On first use, Claude Code may require you to sign in to an Anthropic account. Follow these steps to skip that flow:
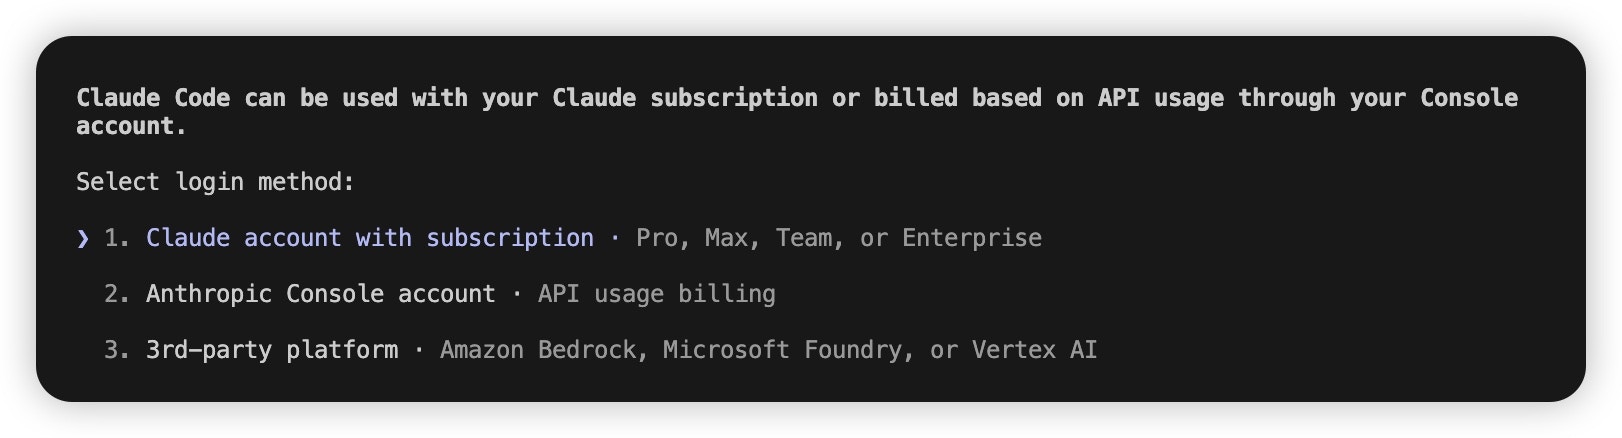
- Locate the
.claude.jsonfile in your user home directory:- macOS / Linux:
~/.claude.json - Windows:
C:\Users\%USERNAME%\.claude.json
- macOS / Linux:
- Set the
hasCompletedOnboardingfield totrue
{
  "hasCompletedOnboarding": true
}- Save the file, then run
claudeagain in the terminal.
(Optional) More ways to configure models
Claude Code supports the following model configuration methods, listed from highest to lowest priority. Higher-priority settings override lower-priority ones.
- During a conversation: Run
/model <model name>to switch models. Best for temporary changes.
/model claude-sonnet-4-5- When starting Claude Code: Run
claude --model <model name>to specify a model. Best for a single session.
claude --model claude-sonnet-4-5- Environment variables: Configure different model tiers by task complexity; Claude Code picks the appropriate model automatically. Applies globally.
export DEFAULT_OPUS_MODEL="claude-opus-4-5"
export DEFAULT_SONNET_MODEL="claude-sonnet-4-5"
export DEFAULT_HAIKU_MODEL="claude-haiku-4-5"
Where:
DEFAULT_OPUS_MODEL: Complex reasoning, architecture design, and other high-difficulty tasks.DEFAULT_SONNET_MODEL: Everyday tasks such as writing code and implementing features.DEFAULT_HAIKU_MODEL: Simple tasks such as syntax checks and file search.
- Permanent settings in
settings.json: Create asettings.jsonfile in the project root or user home directory and add model configuration for project-level or user-level permanent settings.
{
  "env": {
    "DEFAULT_OPUS_MODEL": "claude-opus-4-5",
    "DEFAULT_SONNET_MODEL": "claude-sonnet-4-5",
    "DEFAULT_HAIKU_MODEL": "claude-haiku-4-5"
  }
}
Configure via cc-switch
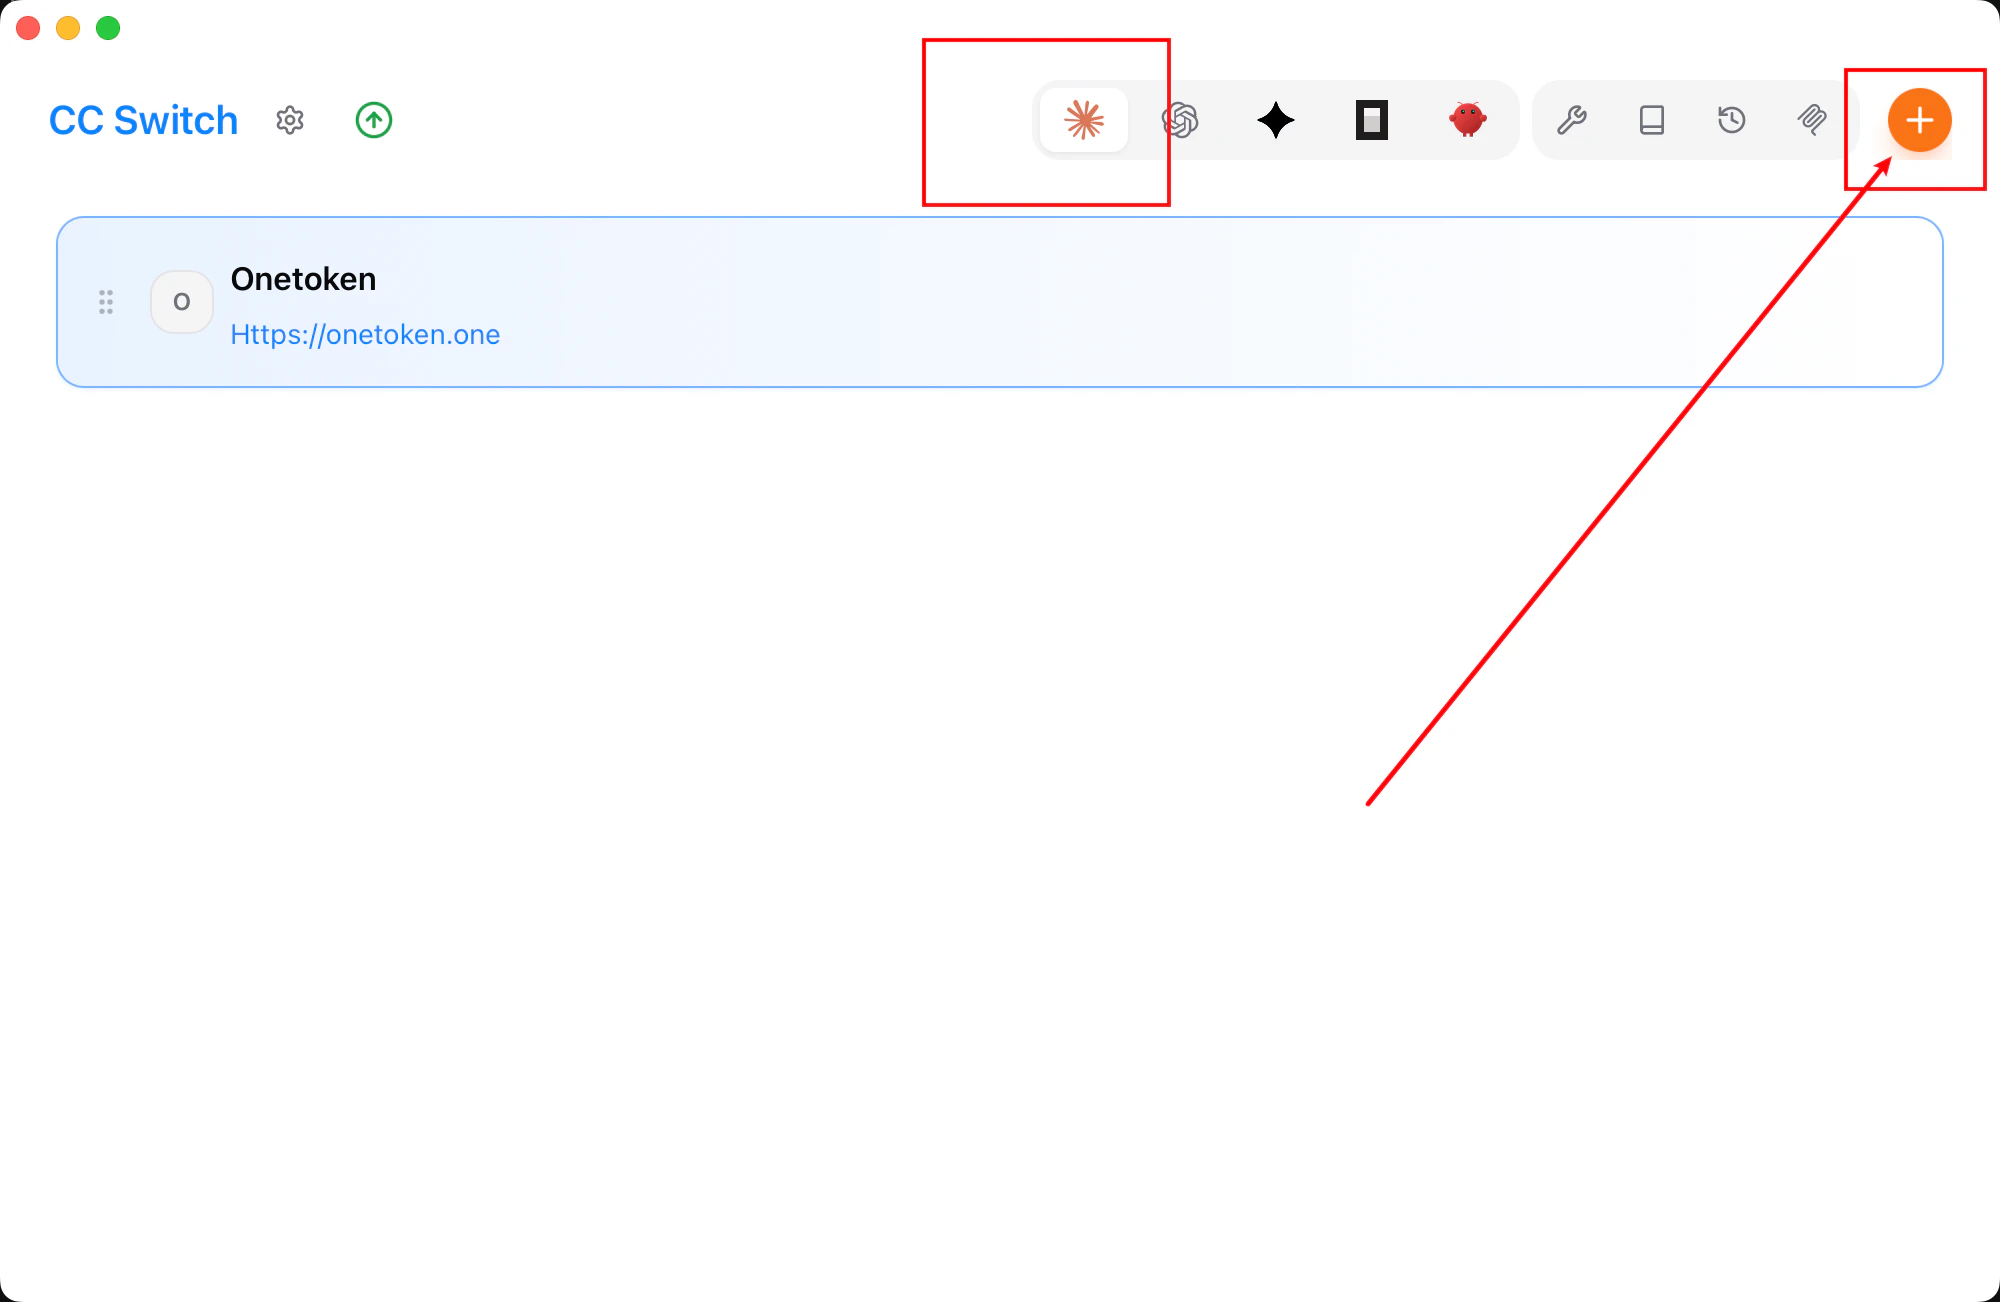
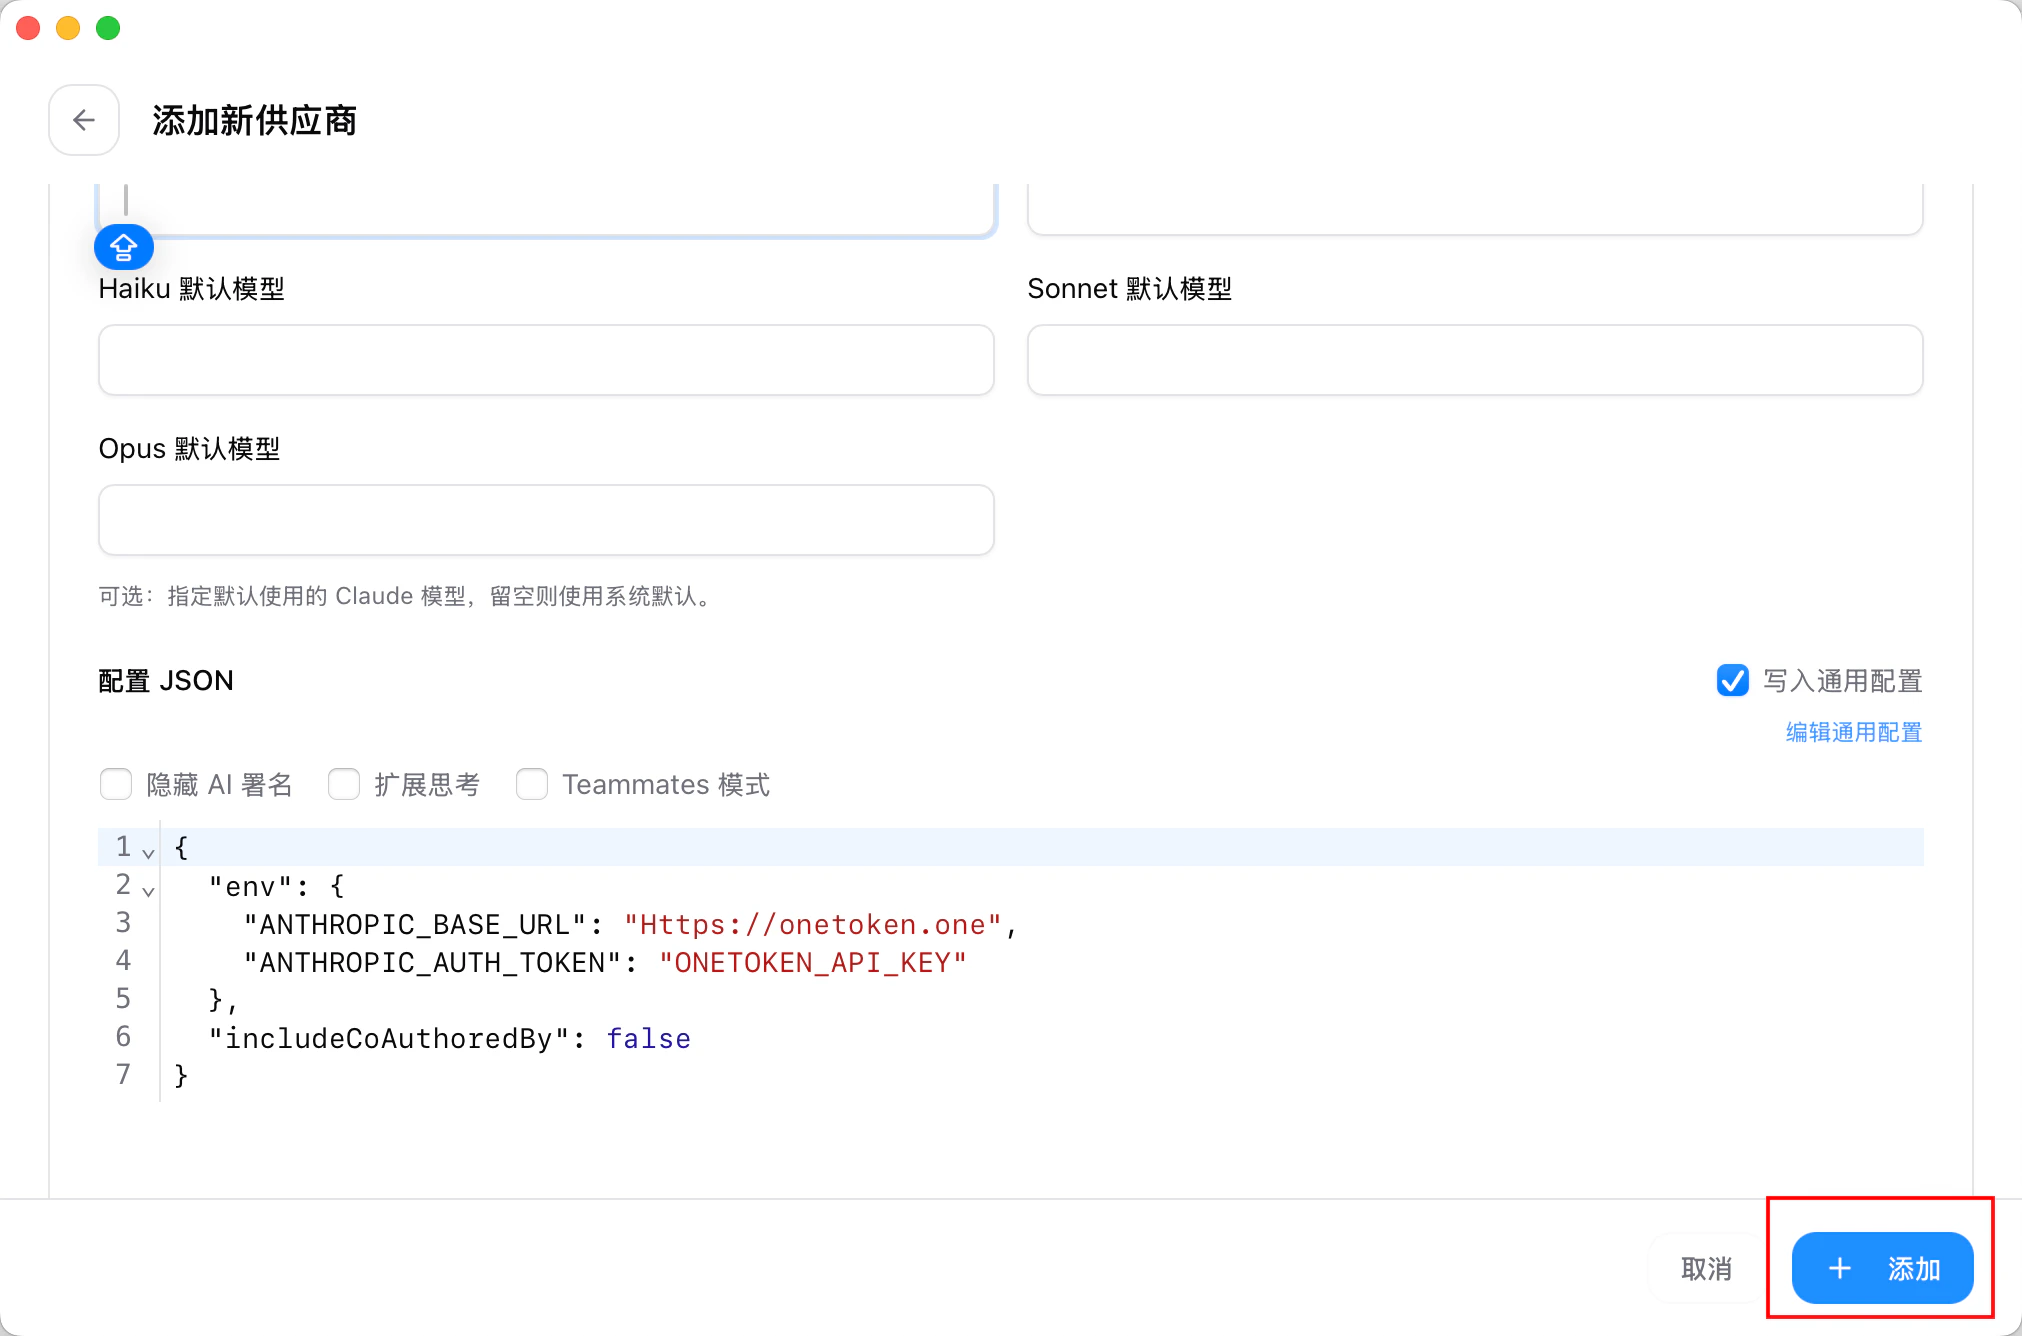
- Run CC-Switch and click Add provider.
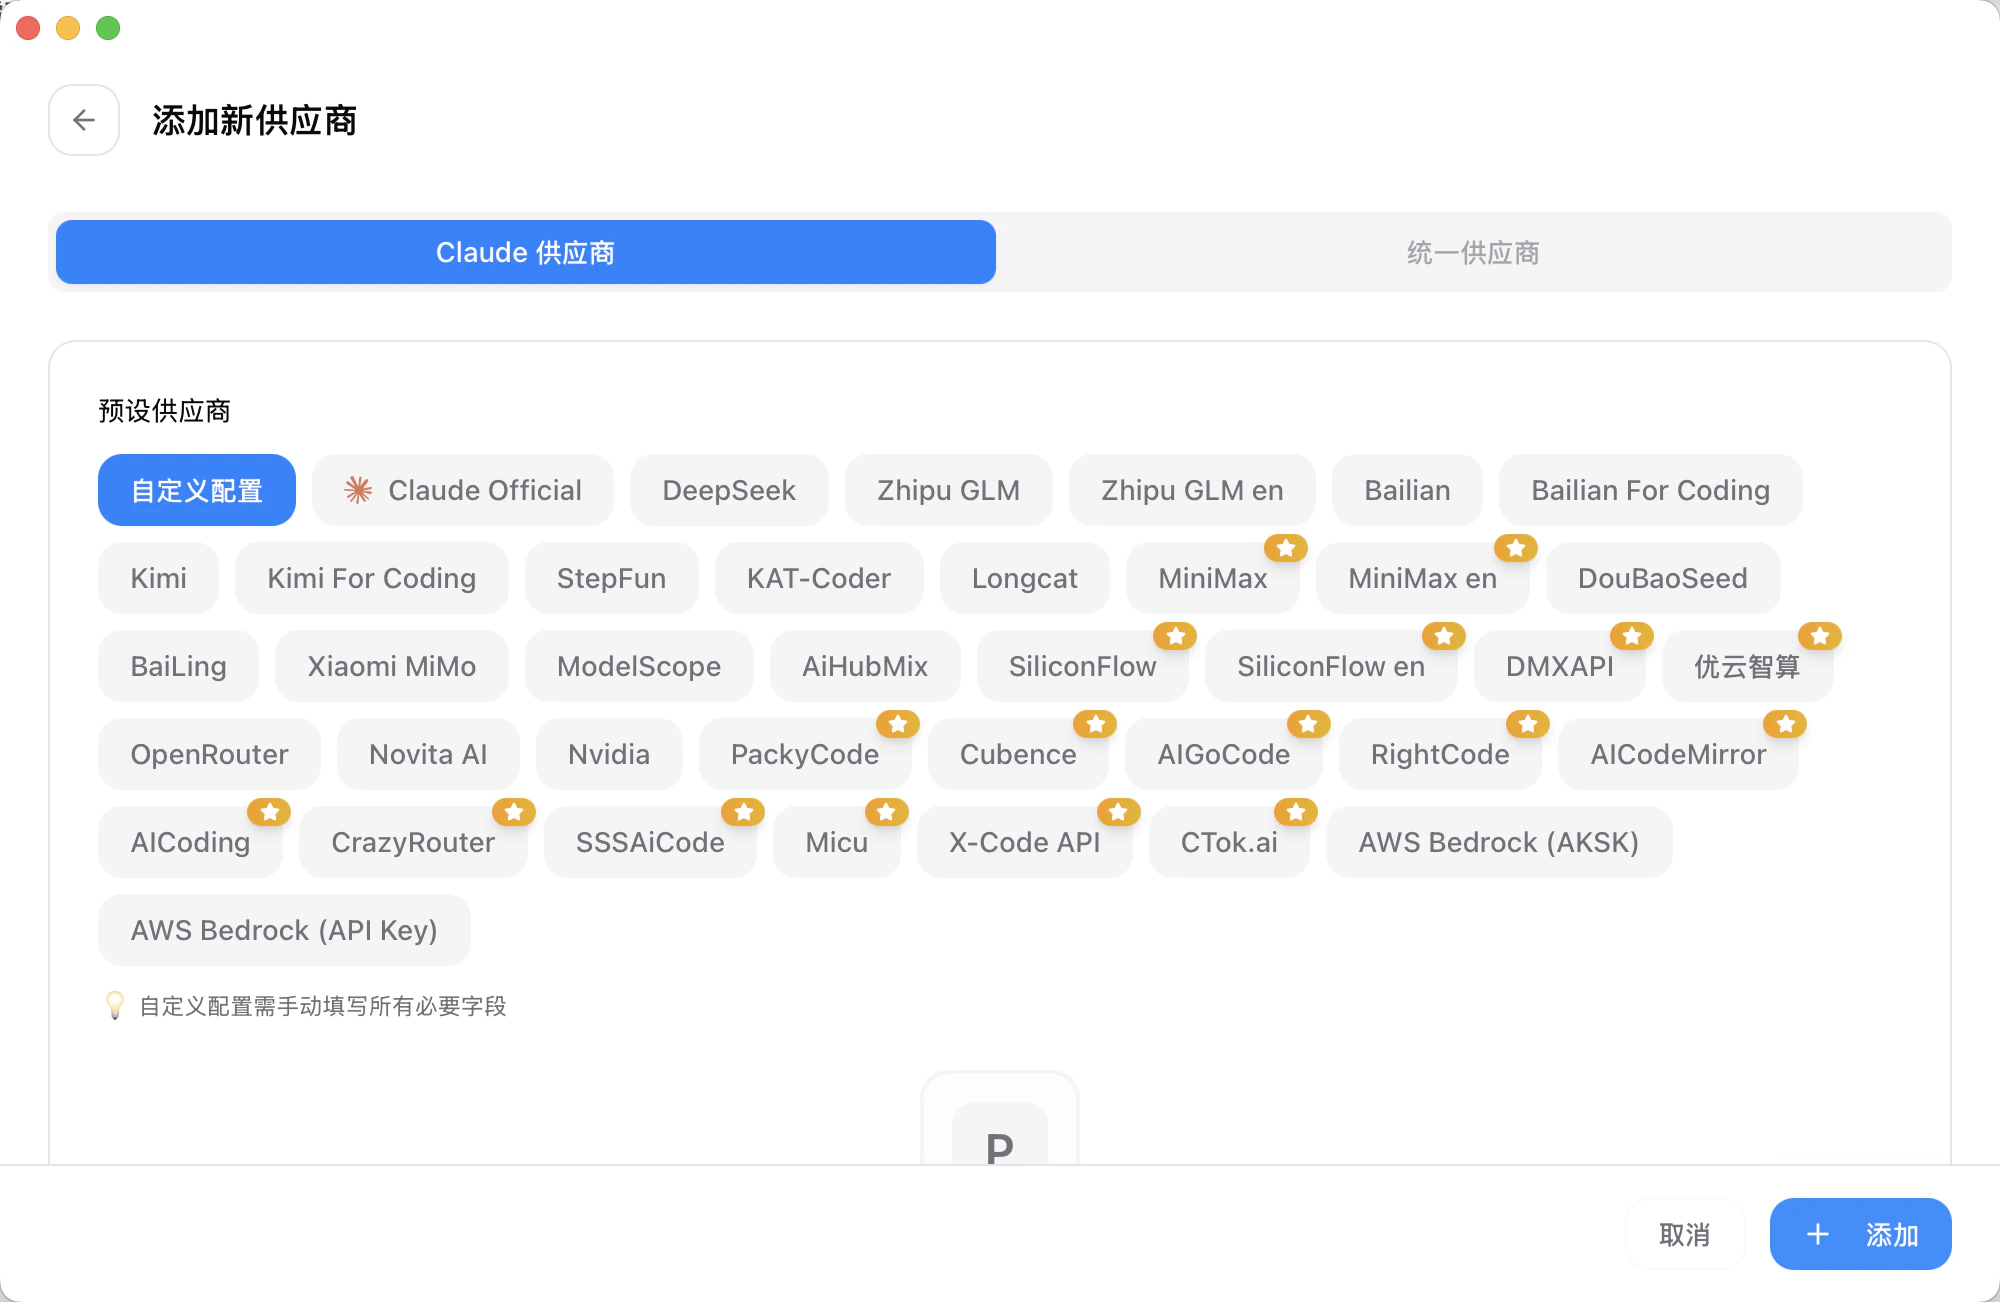
- In the preset list, select Custom configuration.
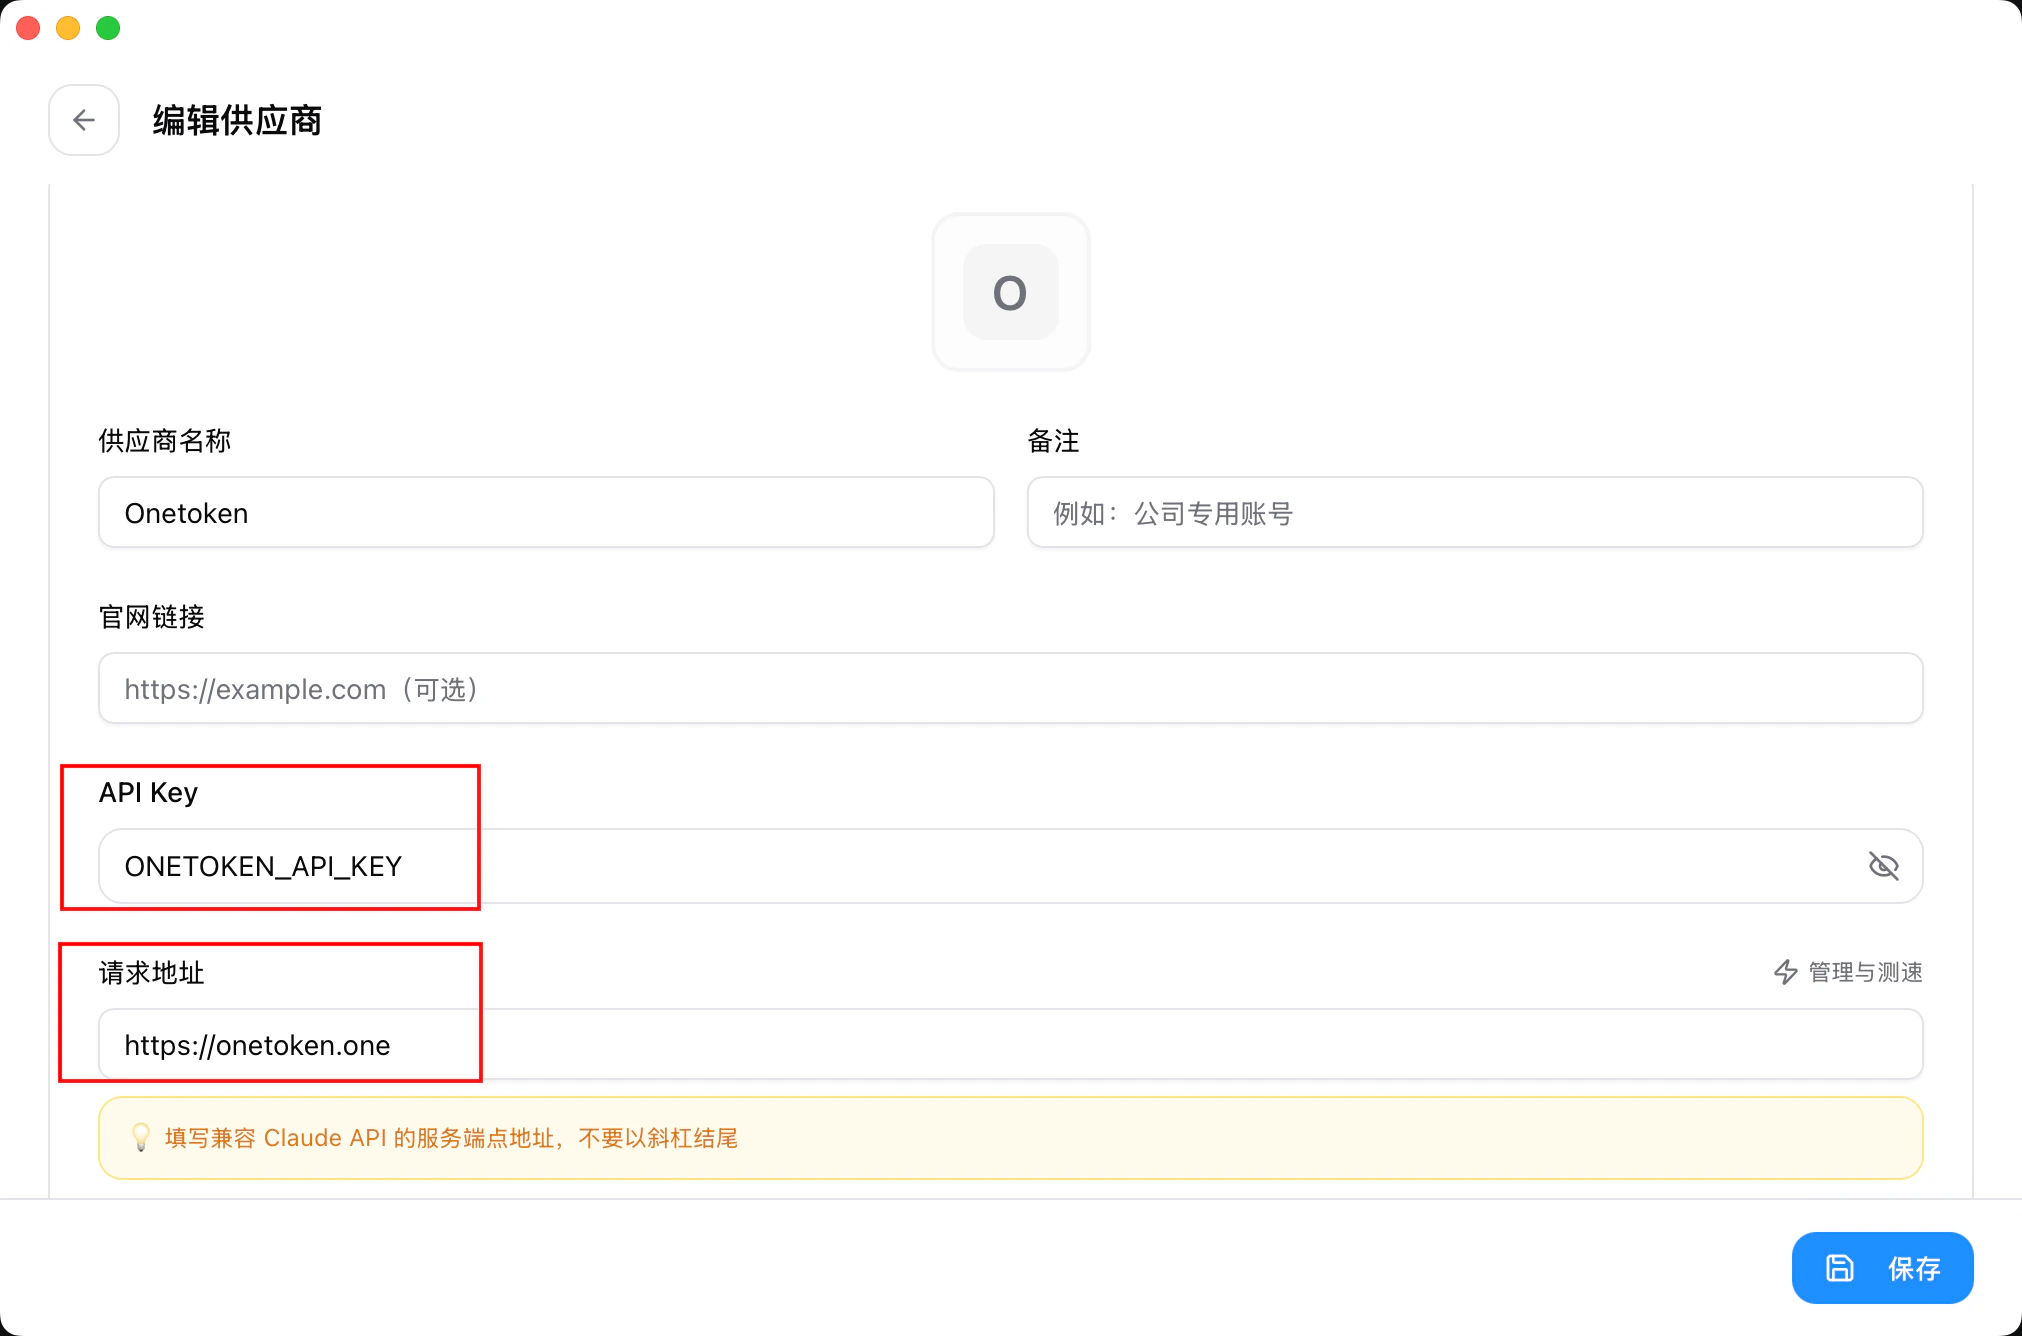
- In the API Key field, enter your key and request URL.
- After configuration, click Add to save.
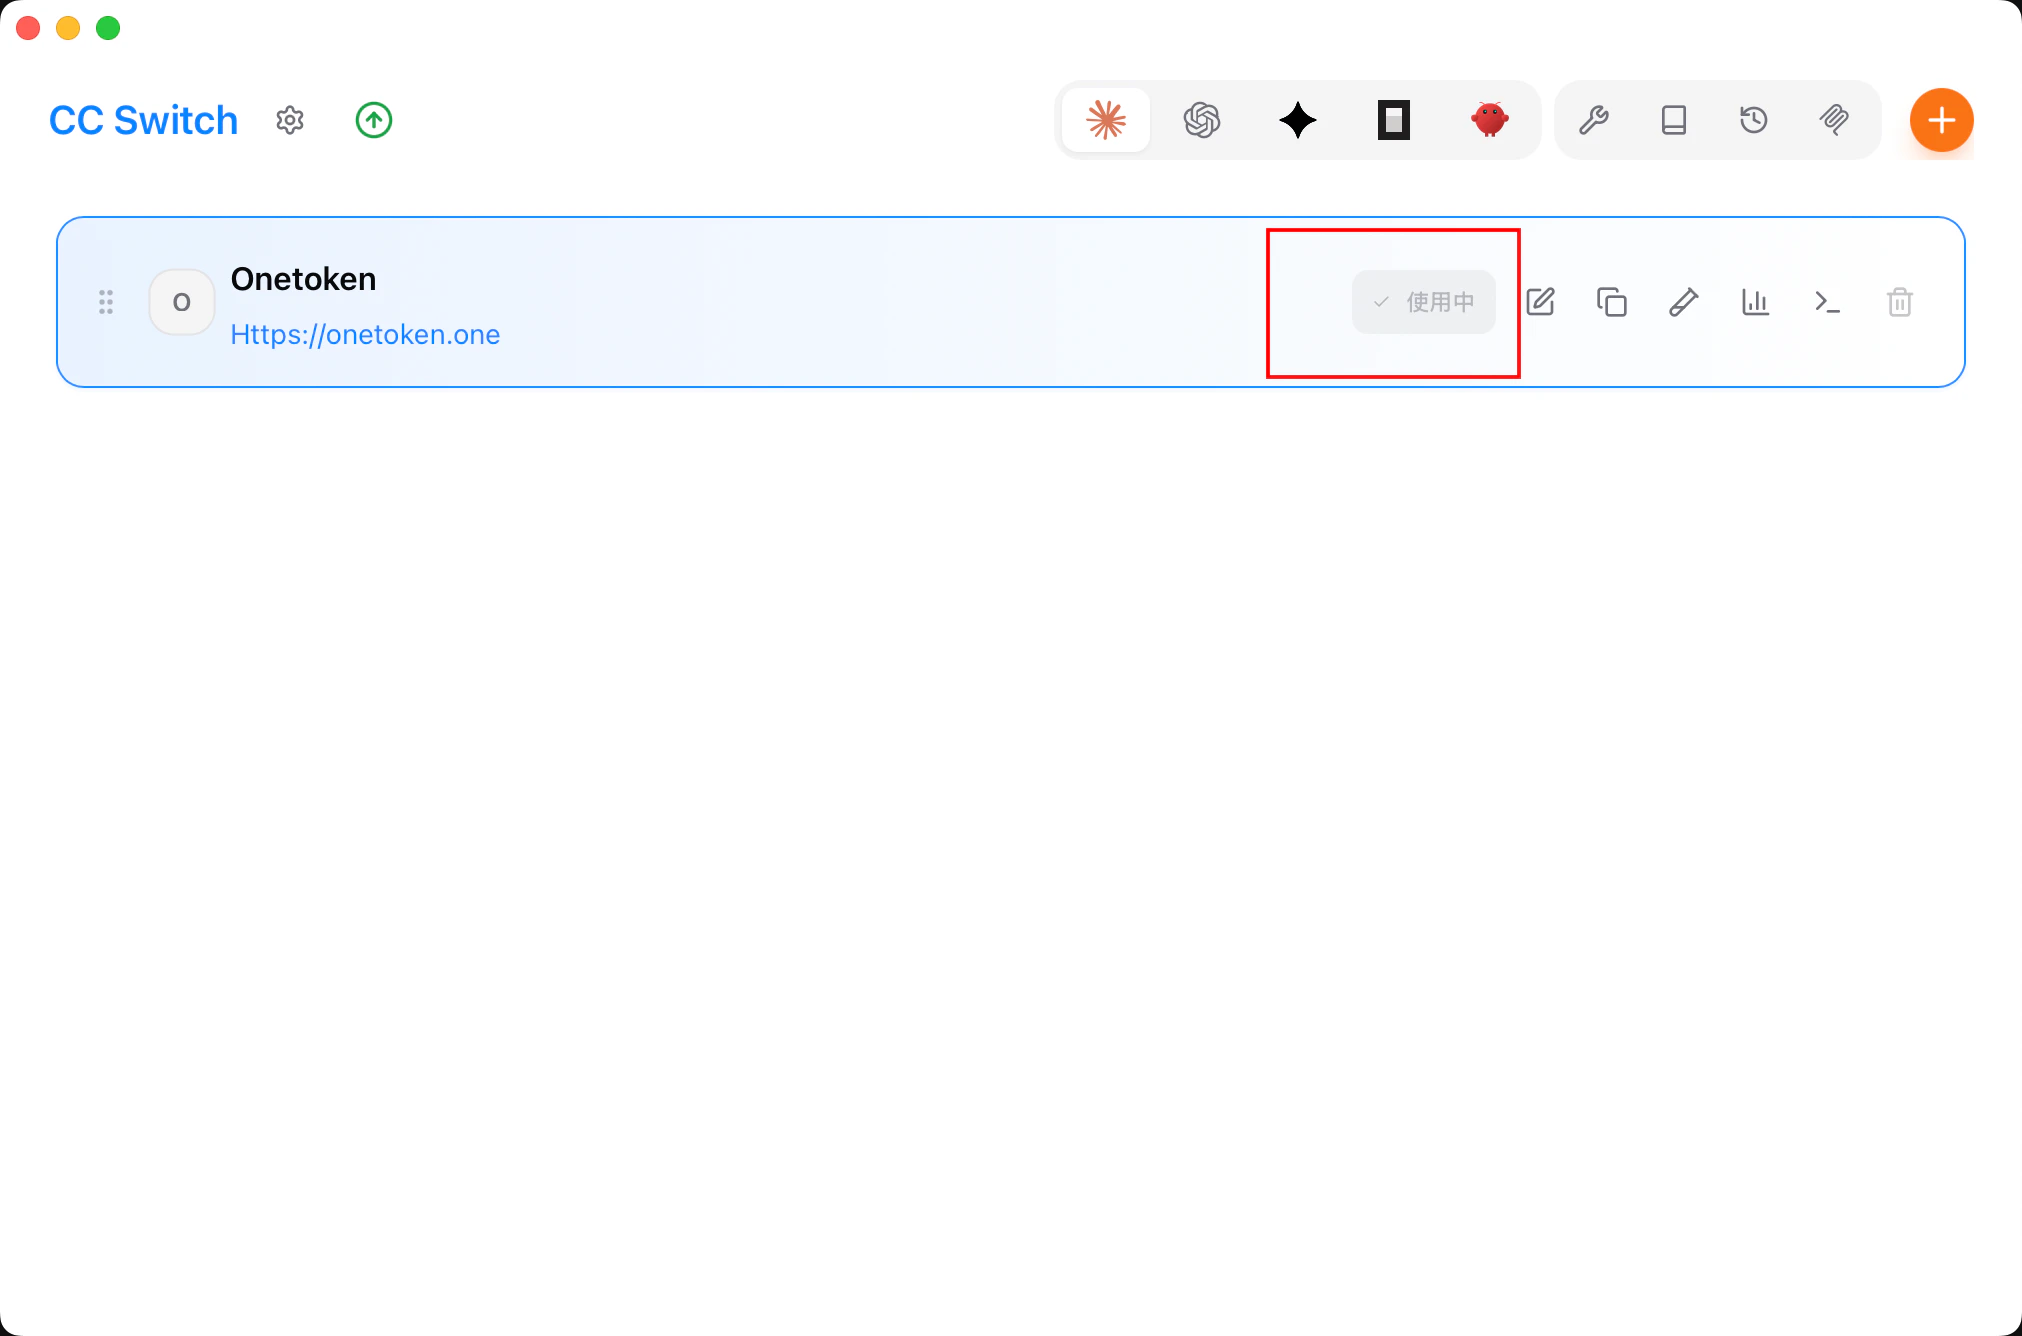
- Return to the home page, select Fast-Token in the provider list, and click Start to begin.
Configure via VS Code extension
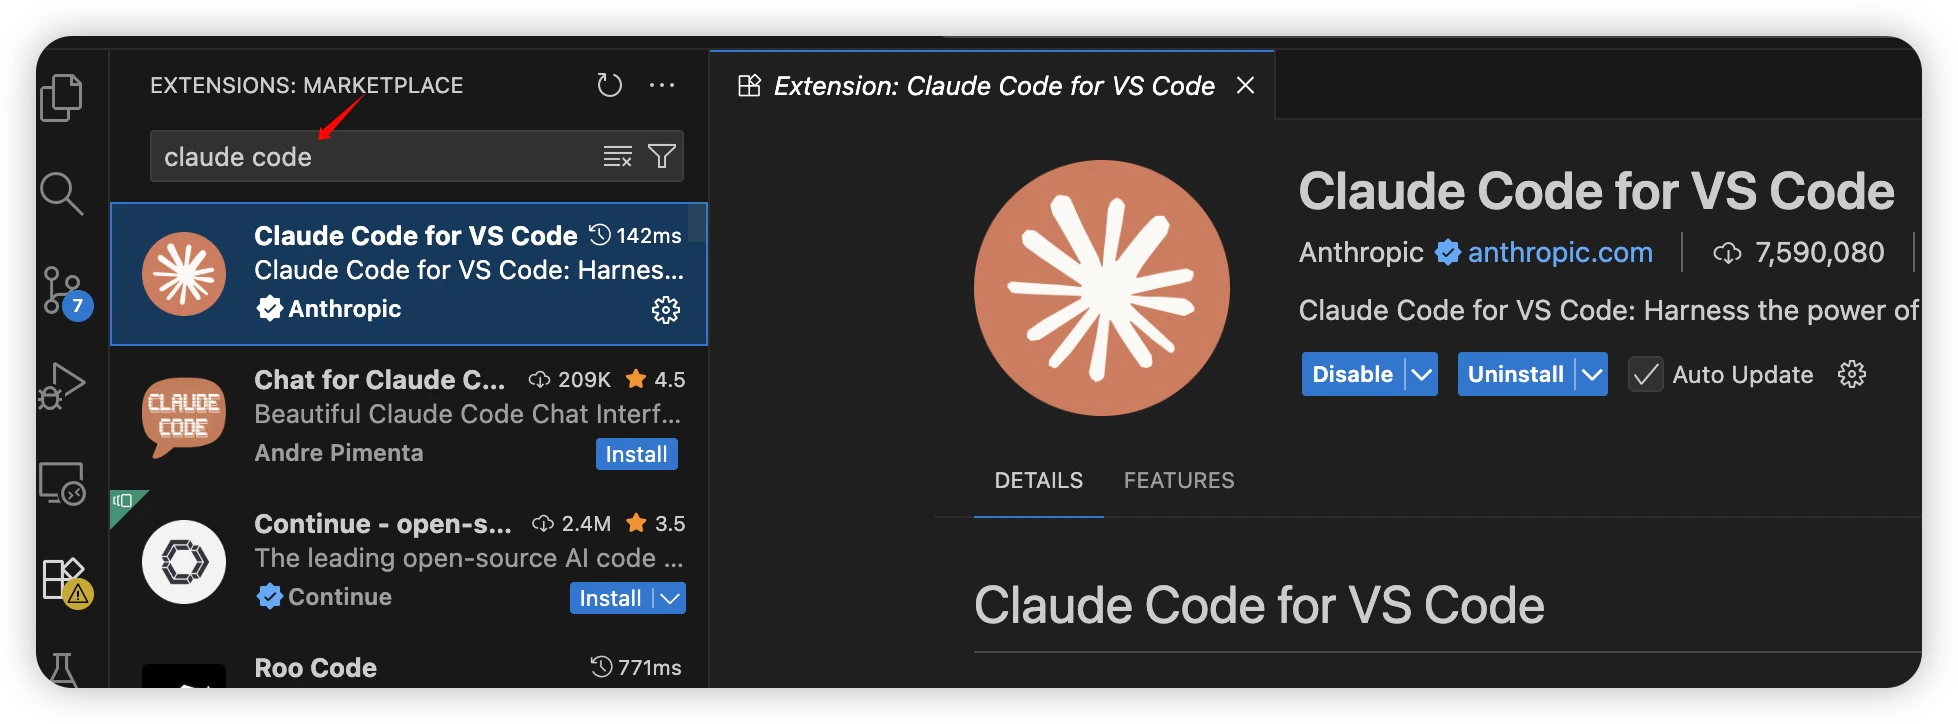
- Open VS Code and install the extension.
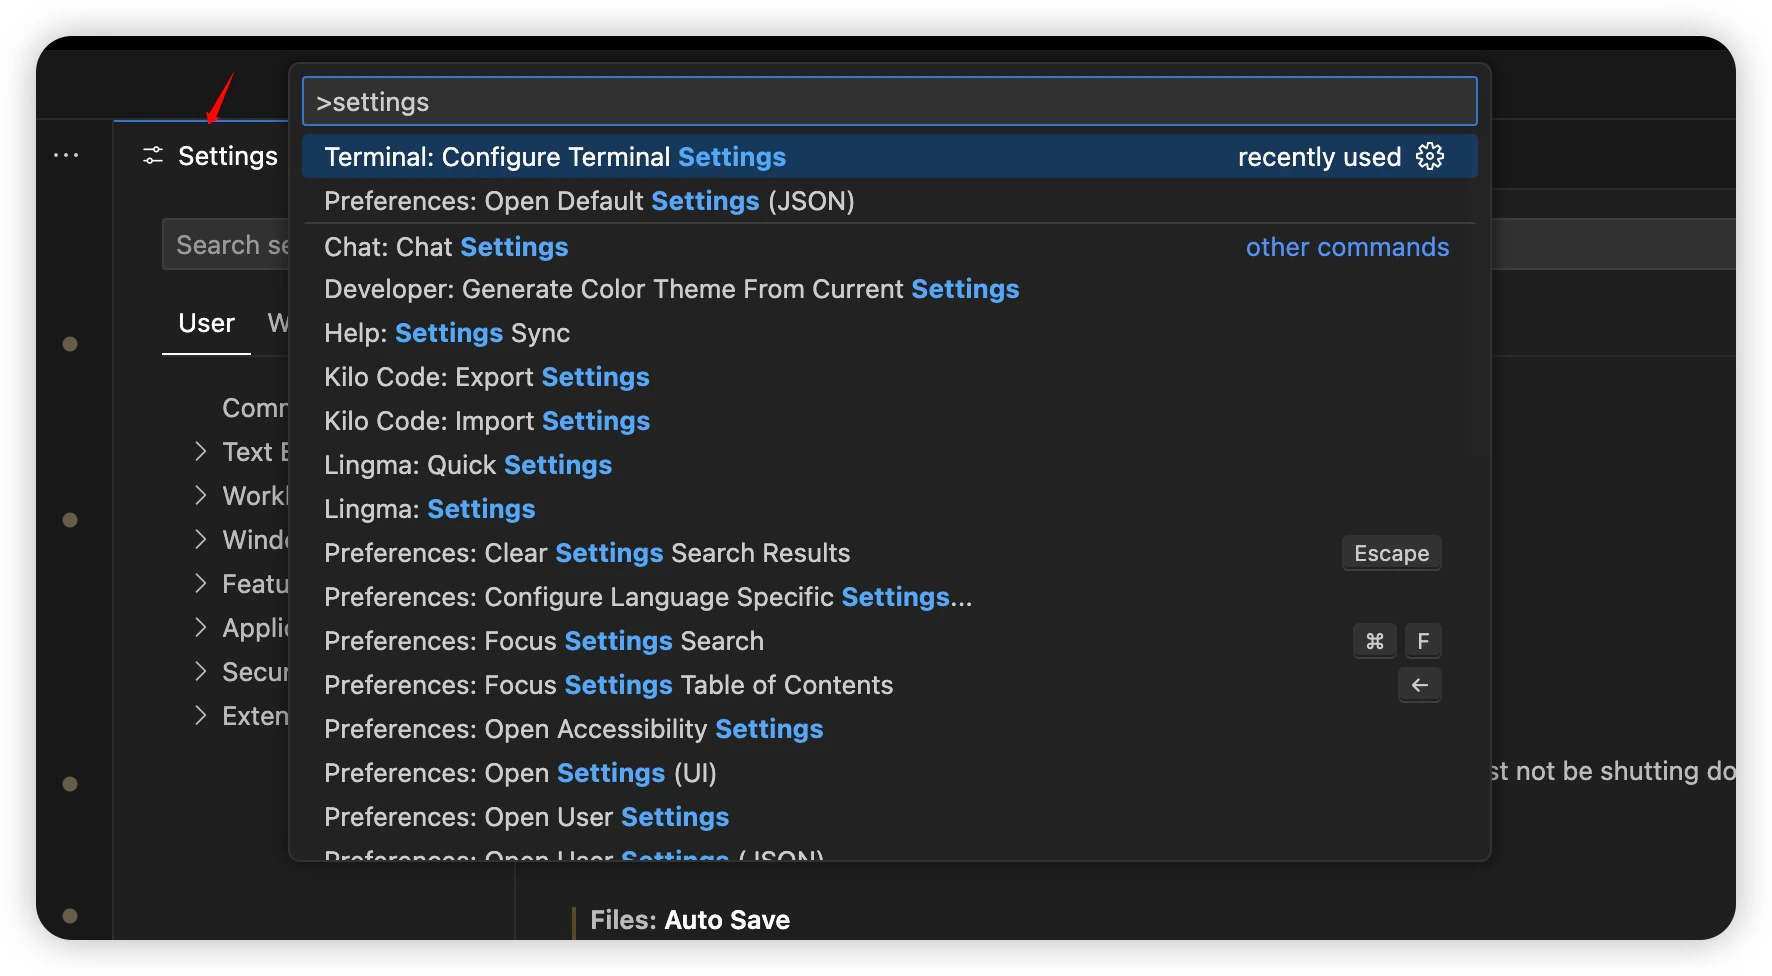
- Press
Ctrl + Shift + P(orCmd + Shift + P), typeSettings, and open settings.
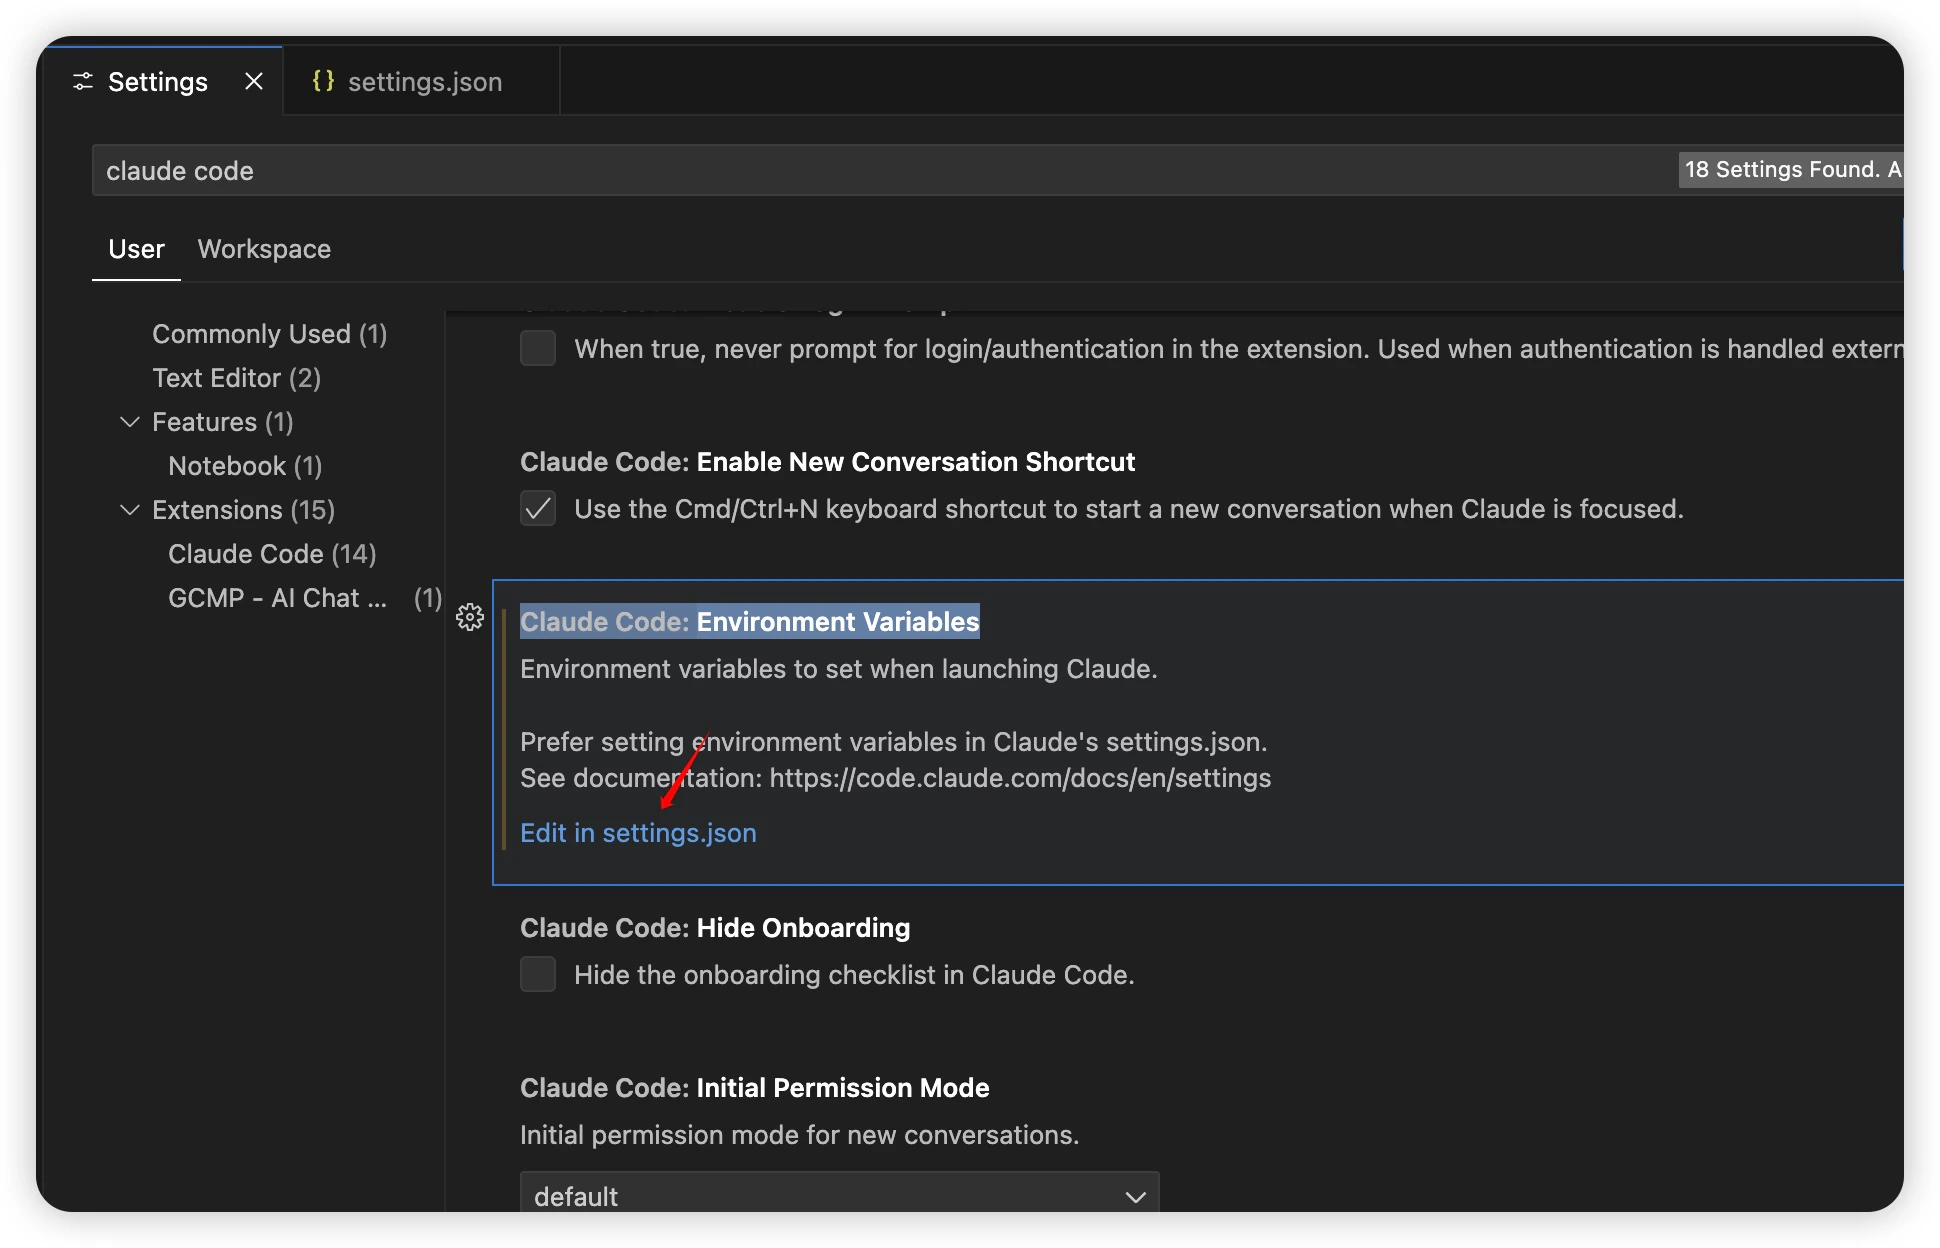
- Search for
Claude Code, then find Claude Code: Environment Variable → Edit in settings.json.
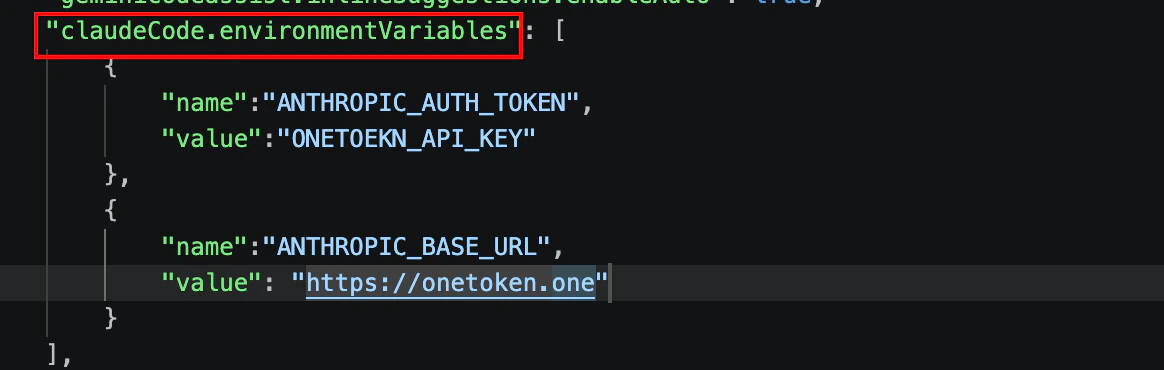
- Fill in Fast-Token details under
claudeCode.environmentVariables.
Use DeepSeek models in Claude Code
Available models: deepseek-r1-distill-qwen-14b, deepseek-v3, deepseek-v3-0324, deepseek-v3-1-250821, deepseek-v3.2, deepseek-v4-flash, deepseek-v4-pro
Method 1: Edit the configuration file directly
Locate the .claude.json file in your user home directory:
- macOS / Linux:
~/.claude.json - Windows:
C:\Users\%USERNAME%\.claude.json
Change the value of ANTHROPIC_MODEL to a DeepSeek model name:
{
  "env": {
    "ANTHROPIC_AUTH_TOKEN": "sk-**",
    "ANTHROPIC_BASE_URL": "https://fast-token.com",
    "ANTHROPIC_MODEL": "deepseek-v4-pro"
  },
  "includeCoAuthoredBy": false
}
Method 2: Use CC Switch to edit the configuration file, set the model name to a DeepSeek model, then restart Claude Code.
FAQ
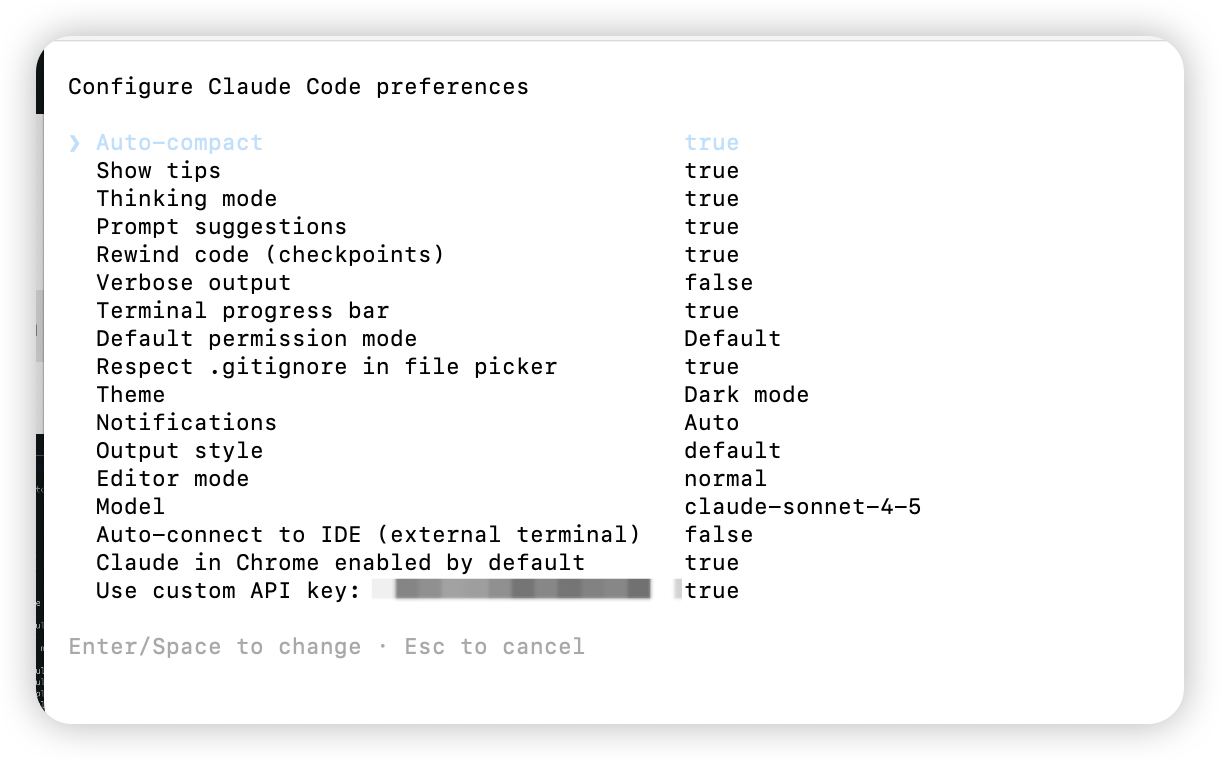
Q: Using Claude Code shows「401 , No token provided....」
Open the Claude terminal, type /config, find the Use custom API key option, and verify the Token is configured correctly.
Q: After successful install on macOS, still get zsh: command not found: claude
The Claude CLI is installed, but its executable directory is not on your system PATH.
- Confirm the Claude install path. The official Claude Code script usually installs to one of:
~/.claude/bin~/.local/bin
In Terminal, run:
ls -l ~/.claude/bin
# or
ls -l ~/.local/bin | grep claude
If you see the claude file, installation succeeded; only PATH needs to be configured.
- Add the install directory to PATH. Run the command that matches your install location:
Case A: Installed in ~/.claude/bin
echo 'export PATH="$HOME/.claude/bin:$PATH"' >> ~/.zshrc
source ~/.zshrc
Case B: Installed in ~/.local/bin
echo 'export PATH="$HOME/.local/bin:$PATH"' >> ~/.zshrc
source ~/.zshrc- Verify it works. Run:
which claude
claude -v
If you see the claude path and version number, installation succeeded.
Q: Claude Code cannot connect to Anthropic services
After upgrading to the latest Claude Code, if you cannot connect to Anthropic services or authentication fails, it is usually because the auth request header name changed. Newer versions require changing the header from API_KEY to AUTH_TOKEN. The API Key value stays the same; only update the header name and reload configuration. See this document to reconfigure.
Q: Login: API Error: 403
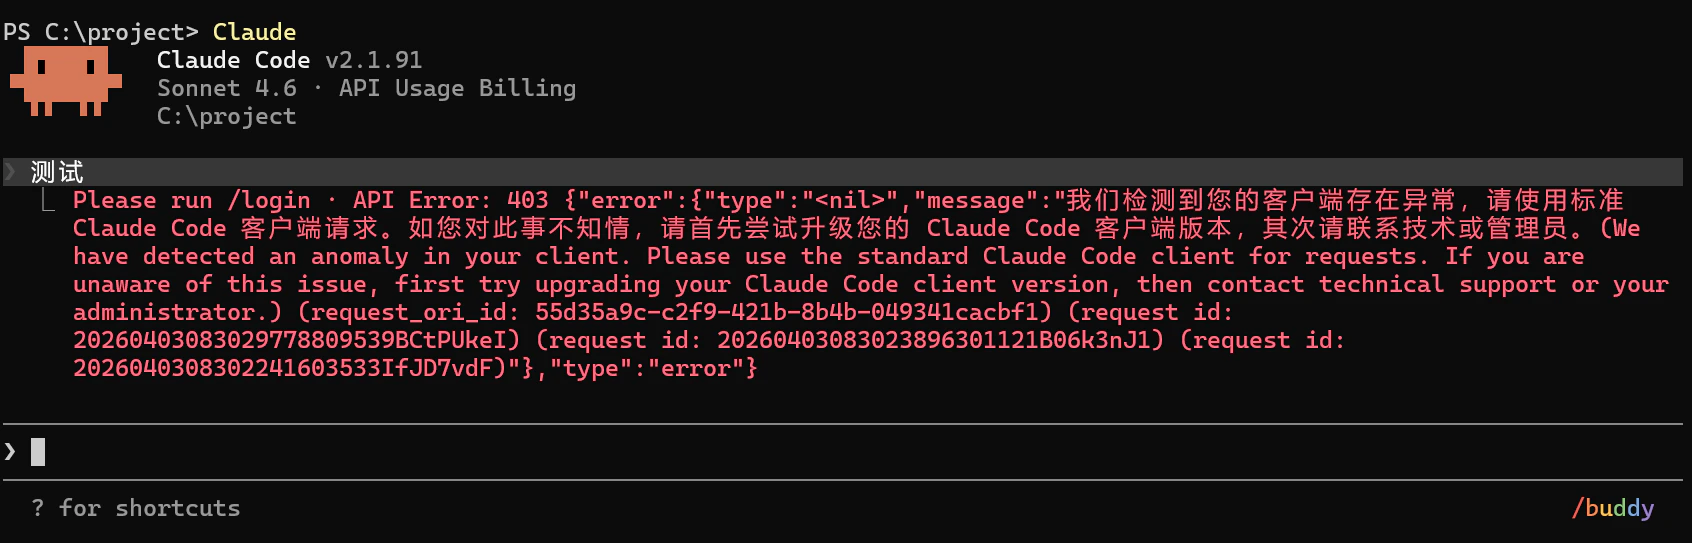
Upgrade cc to the latest version, and disable local proxy and failover in ccs.
Happy coding!